COMPUTER ART: MOTION
Winter 2024
Rendering Animations
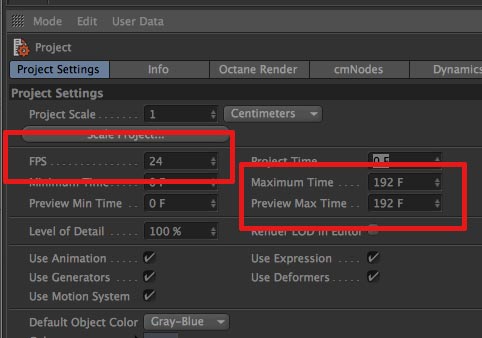
1. Make sure the Project Settings (Edit->Project Settings) are set to 24fps and check the project duration:
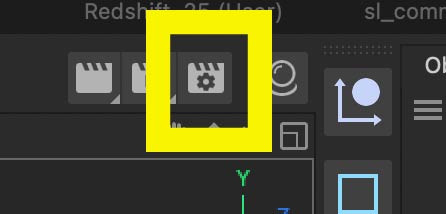
2. Go to the Render Settings:
3. Set the Output size, frame rate (fps), and frame range:

4. Set the Redshift render quality to Medium. (If you are very crunched for time, Low can be used.)
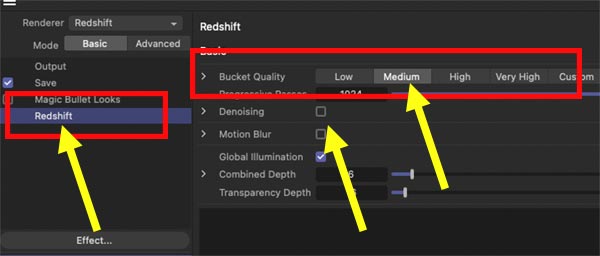
If the renders are very noisy (which is rare but can happen with lots of transparency or soft lighting), turn on Desnoising.
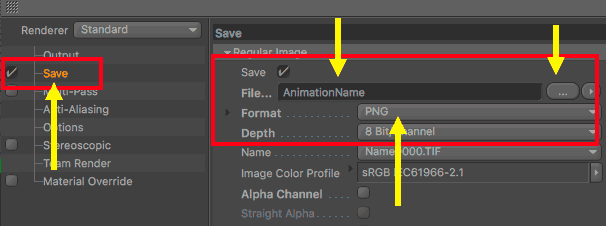
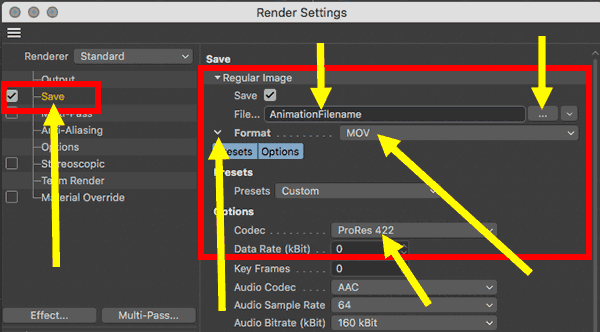
5. Set the Save Settings - set the save name/location, use a PNG sequence (preferred - be sure to save into a folder!):
OR save a MOV (acceptable on a single computer - save preset to ProRes422) - MP4 files are suitable for preview renders only:
* When setting the "save" location/name, be sure to use the Documents folder (if in the lab). It is recommended that you never save projects to the Desktop (and definitely do not save to the Desktop in the labs). Do not save directly to a server as the server could get disconnected and the render will stop.
* Be sure all of your texture paths are correct. The easiest way to do this is to File->Save With Assets. All of your picture files will be copied to a folder for you (called "tex" in the new project folder). Always do a quick test before setting the final render to check for texture errors. You can also use the Texture Manager (under the Window menu) to check for missing textures.
*** Be sure to keep the computer awake using one of the "keep awake" utilities. (The computer studios automatically use Amphetamine; room 65/73/75 should not be used for long rendering.)
*** If rendering a PNG sequence... when in After Effects, rt-click on the imported sequence and check "Interpet Footage." Be sure the FPS matches what was rendered from Cinema4D (should be 24fps).